Something for the weekend ptII – Salt Beef Recipe

20140225_193130To be very fair this is less, something for the weekend, and more something to start at the weekend and finish the weekend after but there you go slow food is so completely worth it.

It is essentially very very simple and creates the most incredible beef, and what’s more a phenomenal beef stock to bag up and freeze.

Stage 1 Ingredients

1.5kg piece of British beef brisket or foreflank
2.5l of water
250g demerara or light brown sugar (if you want totally British you can use Tate & Lyle granulated)
750g salt (don’t go crazy with very expensive salt it won’t give you anything extra, just try to avoid the caking agents)
1/2 tsp black peppercorns
1/2 tsp juniper berries (I bashed mine a bit to let out the flavour)
3 cloves (
2 bay leaves
fresh thyme

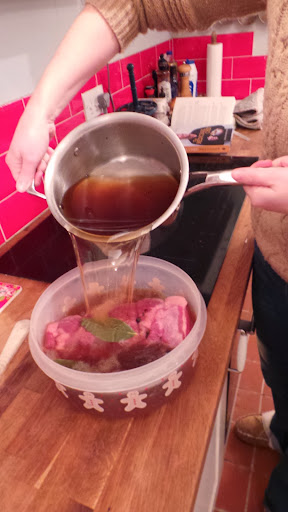
Put all the stage 1 ingredients except the beef into a large saucepan and stir over a low heat until all the salt and sugar have dissolved. Bring to the boil, allow to bubble for 1-2 minutes, then remove from the heat and allow to cool completely. Put your beef in a non metallic container, I used a large plastic cake storage box with a lid, this is pretty important to keep your beef submerged. Cover the meat completely with the cold brine and make sure the whole thing is submerged, I used a cocktail stick in the centre of the beef to push it down when the lid was on. Leave the box in a cool place for 4-5 days.

Stage 2 Ingredients

1 bouquet garni
1 carrot roughly chopped
1 onion roughly chopped
1 celery stick roughly chopped
Half a bulb of garlic

After your 4-5 days remove the beef from the brine, wash in cold water and then soak in fresh cold water for 24 hour. After its soak, place the beef with the rest of the stage 2 ingredients into a large pot, cover with fresh water and poach very gently on the top of the stove for 2-3 hours. Cook until the meat is completely tender and yielding when pierced with a skewer.

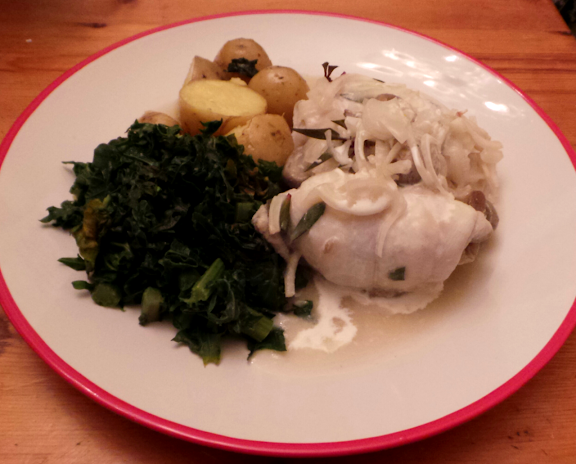
Serve just about however you like be it thick cut in a sandwich, with lentils or with just plain boiled potatoes. However you eat it you’ll love and appreciate every second of your weeks work!

– Emily

Shrove Tuesday Pancake Recipe

I am sure that most you already know how to make pancakes but there is no harm in going back over the basics. So, here is the recipe:

You will need:

  • 100g plain flour
  • 2 eggs
  • 300ml semi-skimmed milk
  • 1 tbsp sunflower oil or vegetable
  • Butter/oil for frying
  • pinch of salt

Method:

Blend the flour and eggs together with a good splash of the milk. This should leave you with a thick but smooth batters. pour in the rest of the milk slowly while whisking until you get the consistency of emulsion paint.

Heat a good size frying pan, pour the batter and heat on each side for about 30 seconds until golden brown. Easy!

Toppings

MrsB’s home made totally British pancetta. Recipe coming soon!

Now it is all about toppings. I spend some time living in Amsterdam after university and, as a sheltered Brit, I was confused by the Dutch’s  love of savoury pancakes. However, I did grow to love them too. So it has become a bit of a tradition in our house of me cooking up Dutch style savoury pancakes for Mrs B.

Tonight I am going to be cooking up pancetta and mushroom pancakes. Before anyone says “pancetta is not very British?”. Well, Mrs B has just made her own…. recipe coming soon!

– James


Something for the Weekend: Part 1 (Smoked Salmon)

You know that feeling when you get to Monday morning and you think, where did the weekend go? I am sure I am not alone in feeling this at times, and as part of my New Year resolution for 2014 I want to try something new each weekend. I am hoping that this way there will be a stand out something for as many weekends as possible, making the weekends seem more productive and therefore slightly longer.

My focus over the last few weekends has been on slow food. There have been chefs both the celebrity type and the not so, who have been proclaiming this as a movement for a good number of years. I think really its just more about giving good, but not necessarily expensive, ingredients a little bit of time and care to turn them into something potentially more valuable and delicious.

The first thing on my to do list within this was to make my own smoked salmon. This, I will admit was prompted more by seeing a half side of Scottish salmon in Tesco for just £13. It is something I have wanted to try for a while and with the raw ingredient at a good price it seemed like the perfect opportunity.

After a good look through the internet I found that really the simplest recipe was just to dry cure the salmon, once rinsed in cold water and patted dry, in a 50/50 mix of salt and sugar. You can add flavourings such as dill or crushed fennel seeds to the cure but I kept things really simple for the first trial. I measured out a half cup of salt and the same of sugar and this seemed to be enough to properly cover the salmon all the way around without there being too much left over. I placed the salmon in a dish and covered it with cling film and into the fridge.

The most confusing information I found was on how long to cure the fish for. This ranged from 1/2 hour right up to 2-3 days. I left the cure on the salmon for 1 1/2 hours and in hind-sight I could have left it on for 2 hours happily as the finished product was salted but not as salty as I like. After the cure was done I rinsed the fish under cold water, patted it dry with kitchen paper and placed it on a cooling rack in the fridge overnight. This, so the internet said, is to create a slightly sticky coating on the fish which helps the smoke stick to it.

The following morning I pulled out the Pro Q cold smoking tray we have. If you are interested in cold smoking food the £35 investment is very well worth it as we have used it countless times for other things, garlic and cheese being two of the most successful. I put a couple of bits of string through the thickest part of the fillet to hang the fish over the smoke, started the tray off and left it in our smoking bin for the day. Its a good time of year to be doing this as its still nice and cold all day which keeps the smoke and the fish cool. Once smoked for the day, I cut the string loops off and put the salmon into a freezer bag and into the fridge. This allows the fish to absorb the smoke flavours.

24 hours later and the fish was ready to eat and it really was delicious. Such a huge quantity of home smoked salmon was well worth the small amount of work and the 48 hours of leaving it alone to do its thing. It brings slow food into a real perspective when you can thinly slice your very own smoked salmon and have with poached eggs for a Sunday breakfast. So I encourage you to give it a go and join the slow food crew or maybe just try it as something for the weekend 😉

-Emily

Making Play Dough from British Ingredients

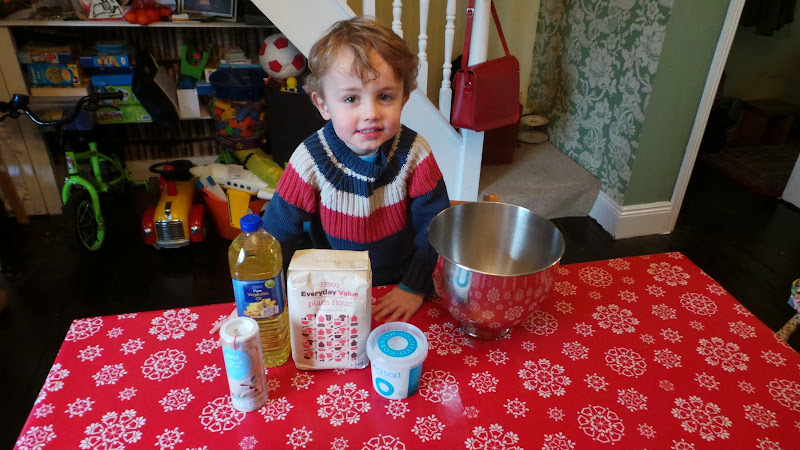
One of Lucan’s favourite activities is playing with his Play Doh, but having recently run low on this colourful modelling material we decided to make our own.

Invented in the USA in the 1920’s as a cleaner for wallpaper it was not until the 1950’s that it was used as a kids toy. Like most American made toys it was made in the states until the 1980’s when production moved to China. However, making your own British alternative is both easy and fun.

You will need:

  • 2 cups flour (Tesco Everyday flour – Made in UK)
  • 2 cups warm water
  • 1 cup salt (Cornish sea salt makes this process quite expensive!!)
  • 2 Tablespoons vegetable oil (Tesco veg oil at 25p is also surprisingly now made in the UK)
  • 1 Tablespoon cream of tartar (We could not find this produced in Britain but it is an optional ingredient that helps with elasticity)
  • Food colouring of your choice (or make your own)

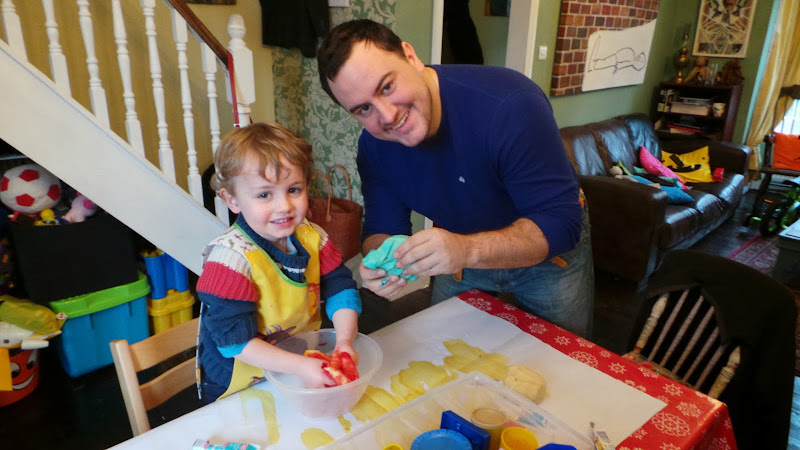
The basic method is to throw all of the ingredients into a bowl and mix thoroughly. Lucan loved the pouring, mixing and generally making a mess. Then you heat the mix in a saucepan over a low heat until the mix binds together and becomes the correct consistency. If the mix is sticky you simply need to heat it a little more. Once cool enough to handle knead in your food colouring on a non-porous surface.

It’s that simple…. or you could buy some British made play dough from The Playdough Factory: http://www.theplaydoughfactory.co.uk/

If you are feeling really adventurous you could even make your own natural dyes with things like beetroot (red),  oak tree bark (brown), camomile flowers (yellow) or blue berries (purple/blue).

– James


British Kale Pesto Recipe

With the winter weather providing a plentiful harvest of curly kale we needed something more to do with it than simply boiling it to mush. A couple of weeks ago a read an article in the Watirose Weekend magazine which mentioned  making a pesto with kale but it failed to give a recipe. So, I decided to experiment.

I am not normally a fan of pesto, as I can’t eat pine nuts (allergies!!) but this one used almonds. Now before we have anyone saying ‘that’s not very British’ you are right they are not British but they are also the only nuts I can eat and are a rather important component of pesto. You could easily substitute this with British walnuts or even fabulous Kentish cobnuts.

Anyway here goes…..

You will need:

  • 5-6 large handfuls of curly kale, de-veined and roughly cut into pieces
  • Rapeseed oil (Farringdons)- enough to allow you to form a mixture
  • 2 cloves of garlic (Isle of Wight Garlic Farm)
  • A small handful of almonds skin on (or the same amount of cobnuts/walnuts)
  • 2 small handfuls of grated hard cheese (Sussex Charmer)
  • 1/2 a lemon squeezed (if you fancy it)
  • Sea Salt (Maldon)

Method:

Very simply, blend or even finely chop until all the ingredients are combined to a consistency you like. I personally prefer mine a little more chunky but Lucan is a fan of the finer blend. Once you are happy with the consistency, taste and adjust the seasoning. I found this needed a little more garlic than I thought (as kale is quite a pungent flavour) and also more lemon than I first thought.

Decant the mixture into clean jars and once almost full top with a small amount more oil. This will create an airtight seal and while your pesto won’t last forever, it will help it to last as long as possible.

I would highly recommend storing some for a week or two before opening as the flavours really do mature beautifully. Also don’t expect this to taste like pesto you are used to. While it is a pesto in its most general sense it is nothing vaguely reminiscent of that which you buy in the supermarket. It is a taste sensation all of its own and we have found a great green addition to lots of different dishes.

Enjoy 🙂

– Emily

How do I cook a turkey?

Those following our blog and Twitter feeds will know that we have already had a dry run at Christmas this year. This also means that we have also done all of the research into cooking the perfect turkey for you.

Remember to buy a British turkey and support your local farmers! Our pre-Christmas British reared bird came from the fantastic Copas Turkeys (www.copasturkeys.co.uk) and we certainly recommend them for quality and customer service. In fact most of these turkey cooking tips came directly from them.

Cooking a turkey in a fan or conventional oven – Quick guide

2kg – 1hr 15mins
3kg – 1hr 45mins
4kg – 2hr 35mins
5kg – 2hr 55mins
6kg – 3hr 15mins
7kg – 3hr 40mins
8kg – 4 hrs
9kg – 4hrs 25mins
10kg – 4hr 45mins

1. Pre-heat the oven at 230c/450F/Gas Mark 8 and rub a teaspoon or two of rapeseed oil all over the bird before seasoning with salt (and pepper if you have some). Place in the tin upside down (breast meat down), cover with tin foil and cook at this temperature for 30 minutes.

2. Then lower the temperature to 190c/375F/Gas Mark 5 for the remaining time (see right).

3. About 30 mins before the cooking time is over remove from the oven, take off the foil and gently turn the turkey over. Put back in the oven without the foil to crisp up the skin.

3. Your turkey is ready when the juices run clear from the deepest part of the thigh or breast or when your thermometer reads 74 degrees at the thickest part of the bird.

4. Leave to rest for 15 – 30 minutes before carving.

TOP TIP: Cook your turkey for the first XXX minutes upside down. This sounds crazy but really helps lock in the moisture and means that there is no need to baste for a golden brown skin.

– Emily

Fried Green Tomatoes …

While there may not be a Whistle Stop Cafe for us, there are certainly plenty of green tomatoes in the garden as a result of the on/off British summer. With the threat of high winds today, I went out this morning to harvest anything that I was concerned about losing to the wind. My cherry tomatoes have done well at ripening and I have a great haul of them (I’ll let you know where they are in a minute) but what to do with the very large tomatoes that have not even reached full size let alone ripened?

With a little inspiration from the film mentioned above (which if you haven’t seen you must) and a quick look on the internet I concocted a little platter for James and I to share along with some leftover fish. It was basically the green tomatoes sliced, dusted in seasoned flour and then fried in a little oil. However, when I tasted a little bit as it came out the pan I was not very impressed with the flavour or rather lack of. I had a little brainwave of topping the scalding hot tomatoes with some of my homemade cheese with some fresh mint added to give it more of a zing.

Before you wonder at the homemade cheese, it is little more than the tail end of the 4 pints of milk we have delivered each week heated to blood temperature. I add a tablespoon of white wine vinegar as I mix gently with a fork then leaving the whole thing to separate and cool before straining the curds from the whey through a cloth. With salt added this is a very rudimentary and easy to make cheese and a great way to use up on the turn milk.

Anyway I digress, I got the cheese out the fridge and mixed in a handful of chopped mint and a few chives and hey presto. On top of the tomatoes they did add the other dimension that they needed to make my green toms into a pretty good starter.

Now for the cherry tomatoes – these are currently in the oven where they will be for the next 8-10 hours on 50 degrees to dry them out before I put them in a jar with rapeseed oil to cover. I did this two years ago and we only finished off these tomatoes at the beginning of this year. I will keep you up to date on how they turn out 🙂

-Emily

Recipe: Rhubarb Cordial

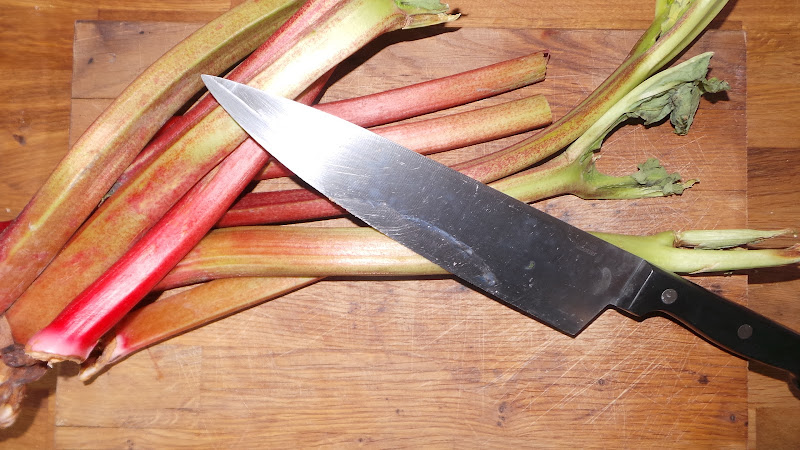
We were racking our brains with what to do with a two week supply of rhubarb delivered recently by our box scheme. They were slowing turning a pale grey when today inspiration hit. Rhubarb cordial… and what is more is that it is remarkably easy to make.

Ingredients

  • 600g of fresh rhubarb
  • Juice of 2 lemons (we cannot buy lemons so substituted for 3tbs of Jif lemon, which actually works just as well)
  • 300g of sugar

Basically the method is pretty simple. Simply chop the rhubarb and throw it in a big pan and cover with water. Let the rhubarb simmer for about 30 minutes and leave to cool.

Once cool enough to handle take a sheet of muslin, or in our case a bit of old bed sheet, and strain the rhubarb mixture through it into a large bowl. This stage requires you to hand the muslin and leave the mixture to filter through over about an hour.

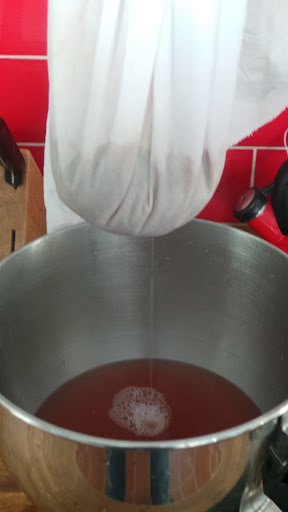
Next, take the filtered liquor and put it back into the pan. Add the sugar and lemon juice and heat slowly until the sugar is dissolved. Do not allow the mixture to boil.

While your mix is on the heat take the time to sterilise a litre bottle. We simply heated a glass bottle with a swing top lid in the oven, but you could equally make up a solution of Milton and soak a plastic bottle for  20 minutes or so. If you choose to heat a glass bottle when you have filled the bottle allow the finished cordial to cool upside down in the bottle. This helps sterilise the lid.


If you want to store the cordial for some time you could add a 55g of citric acid and half the amount of lemon juice.

The cordial should dilute to about 1/3 and is fantastic with sparkling water!


Ginger nuts and beer guts

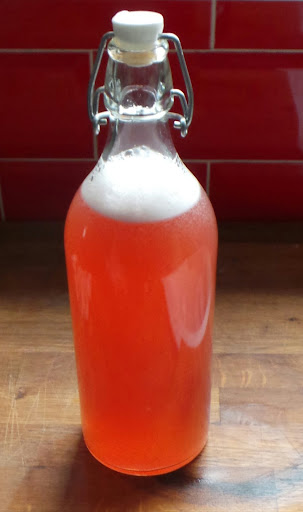
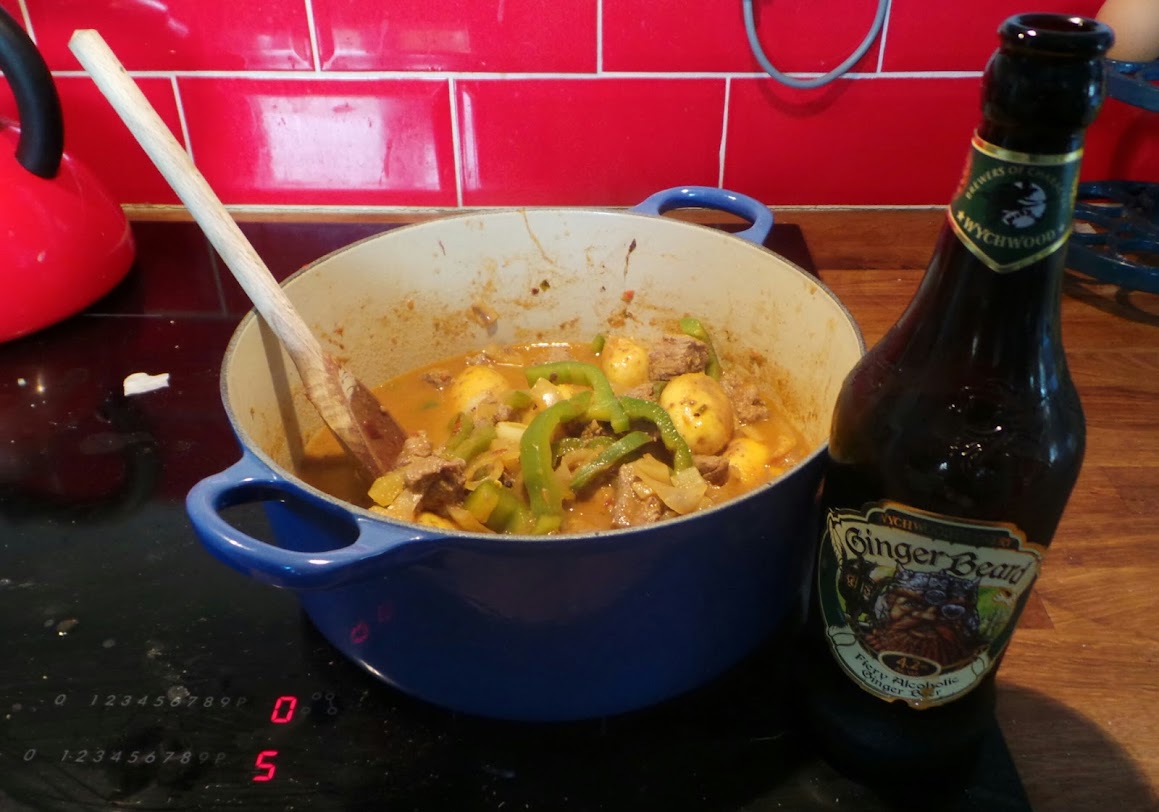
Today was one of those days when the cupboard was bare. Expected to put a nice dinner on the table this evening I was really struggling with the lack of groceries so had to get experimental. These culinary adventures do not always pay off but I am pleased to announce that today’s was a triumph.

I found some beef in the freezer so decided that this was going to form the basis of a one-pot stew. Yes, it is summer and not traditionally a time for such hearty grub. I don’t know about you but it is feeling distinctly un-summery around these parts.

Anyway, raiding the larder some more I found an eclectic mix of veg including; garlic, cabbage, potatoes, asparagus and white radishes…. Yes, Radishes in stew!

I also found some Sharpham Park spelt and the home made passata I made a couple of weeks ago. However the jewel in the crown of this stew was going to be bottle of Wychwood Brewery’s alcoholic ginger beer. As you would imagine, buying only British, we have yet to find anywhere that we can buy fresh ginger so I thought that throwing a bottle of this brew in my stew would be an interesting little touch.

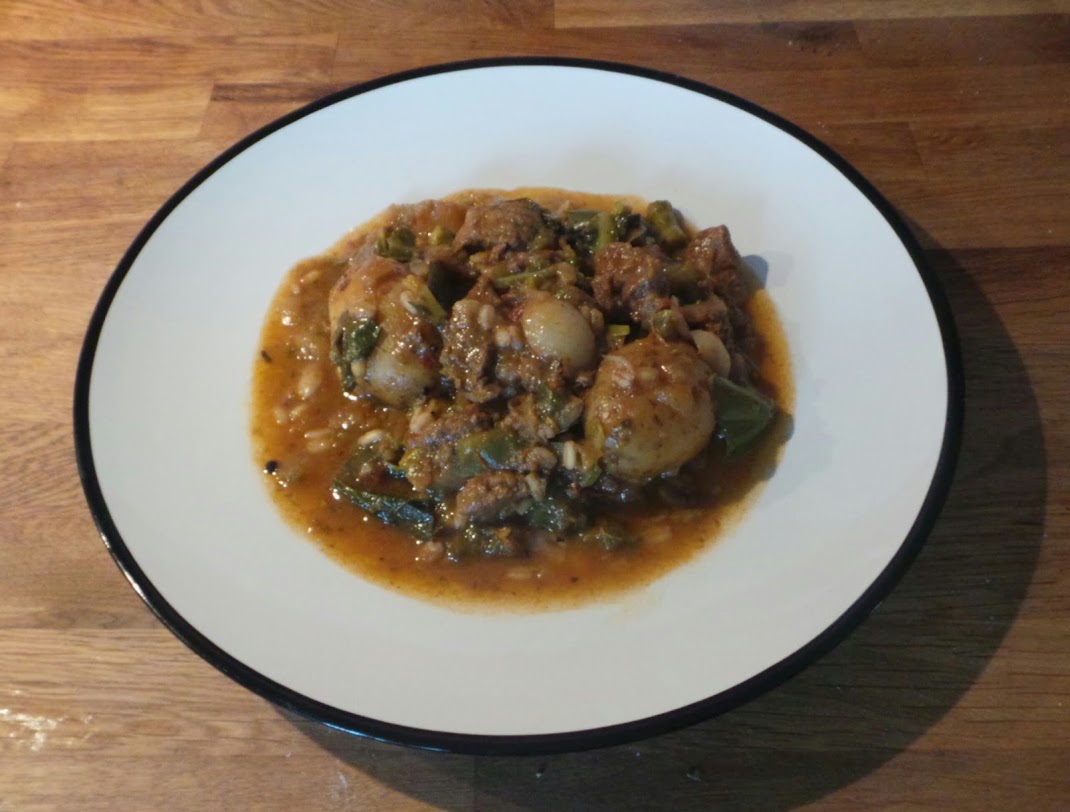
Now, I am not going to tell you how to make a stew suffice to say that I threw all of my spoils into the pot and left for 3 hours to simmer on a low heat.

The result was pretty good but the addition of the ginger beer really added a flavoursome gingery zing that we have not tasted in our food for 6 months. A triumphant ingredient in my book!

I am thinking that a bottle of this stuff might be an interesting addition to a Thai curry or some other Asian style recipes. Give it a go and let us know how you get on!

– James

A Fish Supper with Sole

With our once monthly fish box arriving on our doorstep yesterday we decided to make the most of it and eat it while its really fresh. We had a wonderful haul of cod, plaice fillets, scallops, dover sole, lemon sole and sprats.

We coated the sprats in a light batter made of plain flour, salt and a little of the fabulous Nyetimber (extravagant yes but it was bubbly and open). They were then shallow fried in oil over a high heat. Ideally they would have been deep fried but rapeseed oil is quite expensive and we didn’t want to go mad. They were very good although I will admit that they are not my favourite to eat but were a good starter to our fishy supper.

Next I moved my attentions to main course. Lemon sole with a creamy mushroom sauce. I would totally recommend this as a special treat.

Ingredients

4 lemon sole fillets
4 scallops without the roe
150 ml white wine or bubbly 🙂
150 ml water
1 small onion, peeled and sliced
6 small mushrooms
bay leaf
a sprig of pepperleaf
1 tbsp butter
1 tbsp flour
2 tbsp single cream
Method
1. Roll the scallops inside the fillets of sole head to tail and arrange in an oven proof dish.
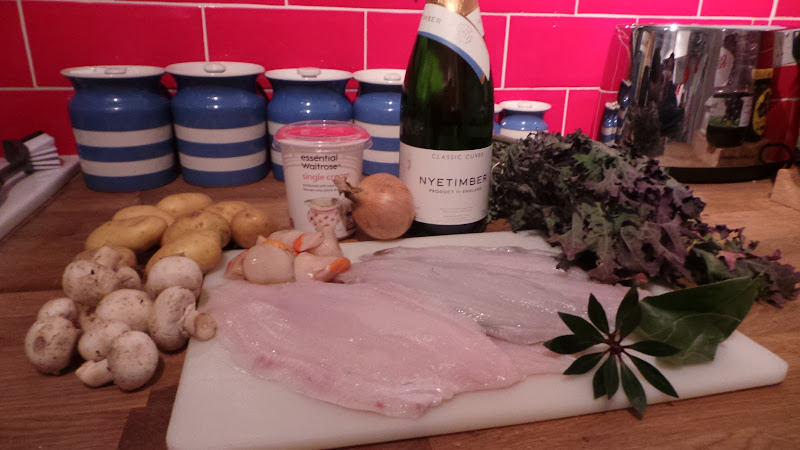
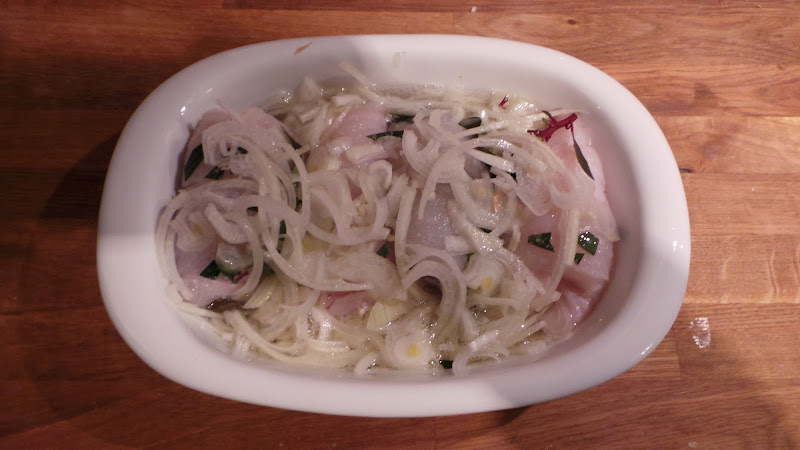
2. Pour over the wine, water, onion, mushroom stalks, herbs and seasoning.

3. Bake, covered at 170°C with a buttered paper or foil or lid, for 20 – 30 minutes.

4. Strain the liquid from the fish and make up to 300 ml (1/2 pt) with extra water or wine if necessary.

5. Poach the mushroom caps in this liquid for a few-minutes — remove and keep warm.

6. Make a roux with the butter and flour and make up a sauce with the fish liquid.

7. Add the cream to the sauce just before serving, pour it over the warmed fish, and serve with the mushroom caps.

We had some boiled new potatoes and some lovely red chard with our sole and I have to say that it was really really tasty. 🙂
– Emily
Visit Us On TwitterVisit Us On FacebookVisit Us On PinterestVisit Us On YoutubeVisit Us On LinkedinCheck Our Feed